Installing the Plugin (WooCommerce)
You can use ePAL's guided installation to help to get it up and running quickly.
Prerequisites
-
You have deployed the plugin as described in the Uploading the Plugin (WooCommerce) topic.
-
You can create a new user in step 2 of the guided activity or you can sign up for one at the ePAL Portal before you start the installation.
Guided Installation
The plugin's guided installation consists of 5 steps. These are displayed in the header during installation. As you complete each step, the circle around each step changes to green. Blue represents the current step.
To access the installation, click Start ePAL Onboarding.
To access this guide at anytime, you can amend your WordPress Admin URL with
/wp-admin/admin.php?page=wc-settings&tab=epal§ion=setup
.
- Enable Taxes and Calculations: Enable taxes and configure some other WooCommerce settings.
- API Credentials: Configure your access credentials.
- ePAL Tax Configuration: Configure the ePAL tax settings.
- Shipping: Configure your shipping settings such as your shipping address. Add ePAL as a shipping method.
- Product Configuration: You need to generate and review HS6 codes for your products.
1. Enable Taxes and Calculations
The first step prompts you to enable ePAL's use in WooCommerce:
To open the relevant settings page, you can click Open WooCommerce General Settings. The following UI is displayed:
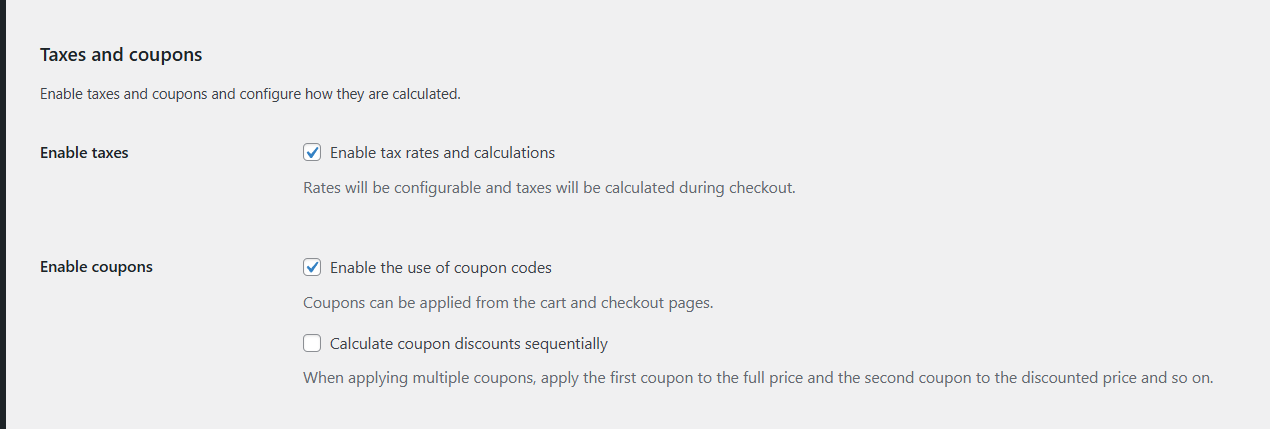
Ensure that the Enable tax rates and calculations checkbox is selected.
2. API Credentials
You can create a new ePAL user or you can sign in using an existing one in Step 2:
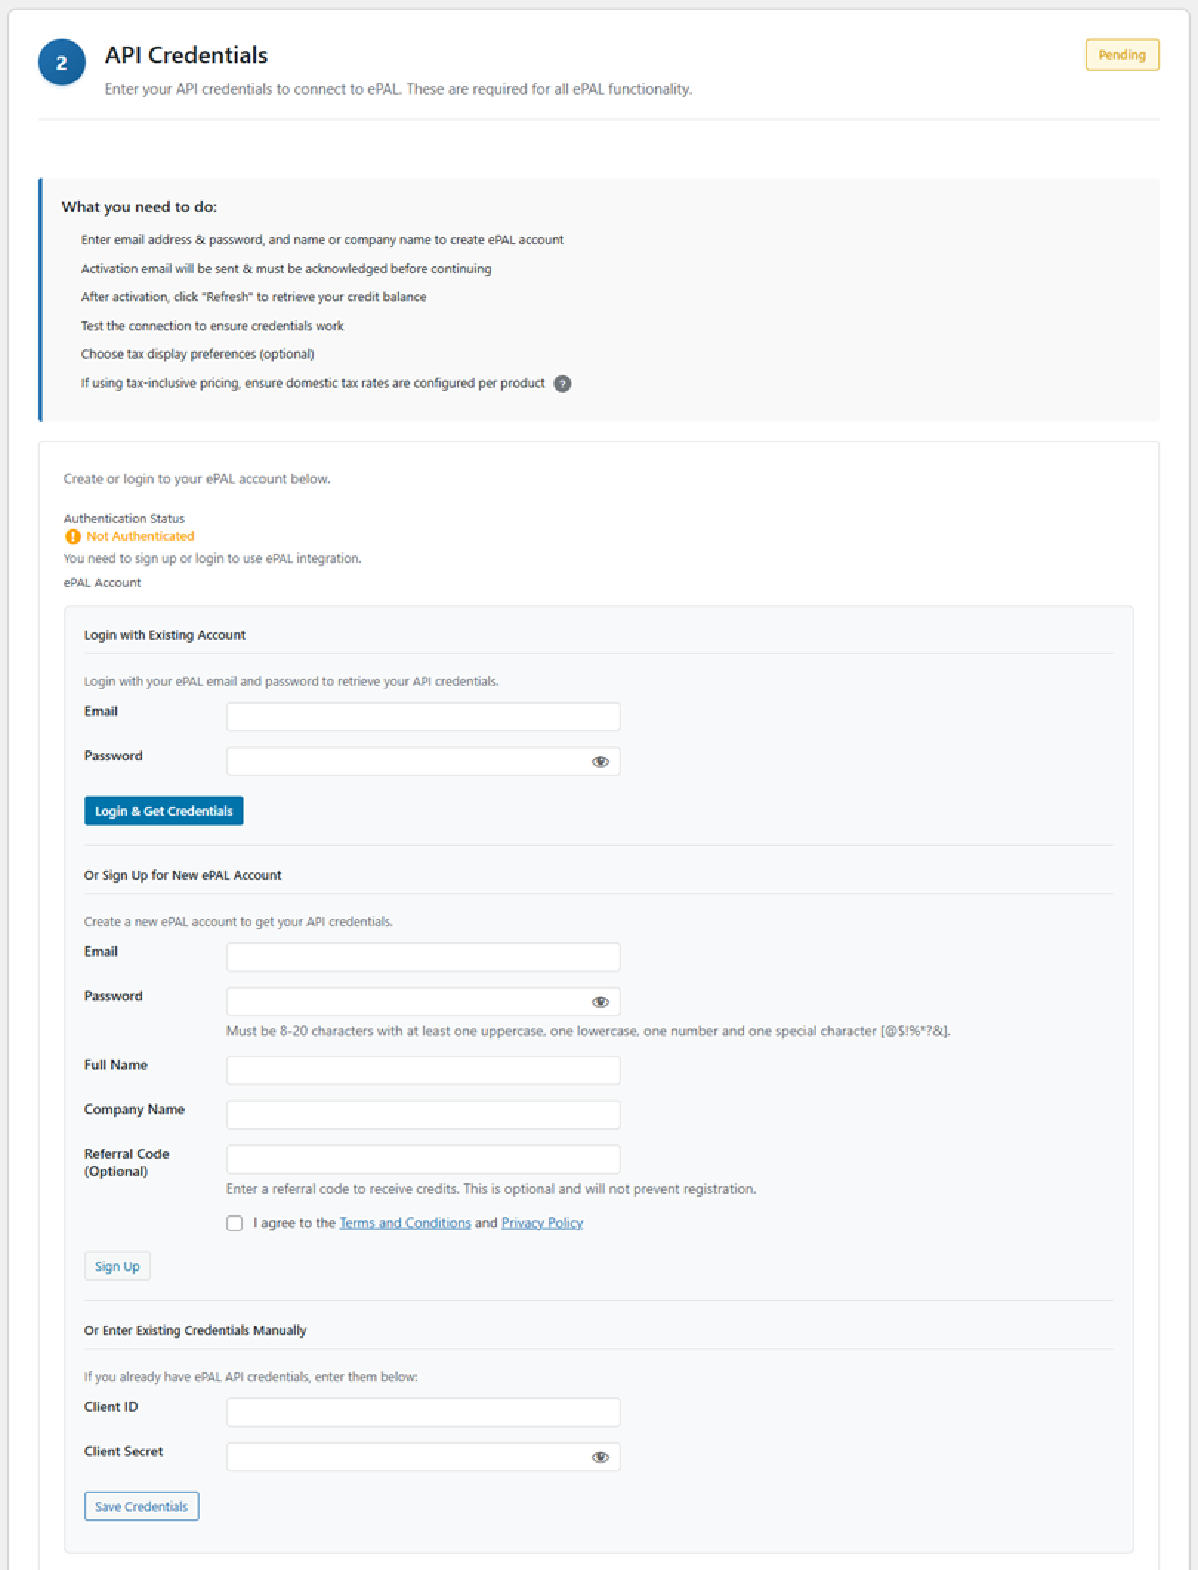
- If you have an existing user account from the ePAL Portal but have not yet retrieved your API credentials, you can enter the email and password and then click Login and Get Credentials.
- If you want to sign up for an ePAL account now, complete the Email, Password, Full Name, and Company Name fields. Then click SignUp.
- If you have an existing users and have already retrieved your credentials, you can enter them in the Client IDand Client Secret fields.
Once you have successfully signed in, you may need to reload the page when prompted. The following UI is diplayed:
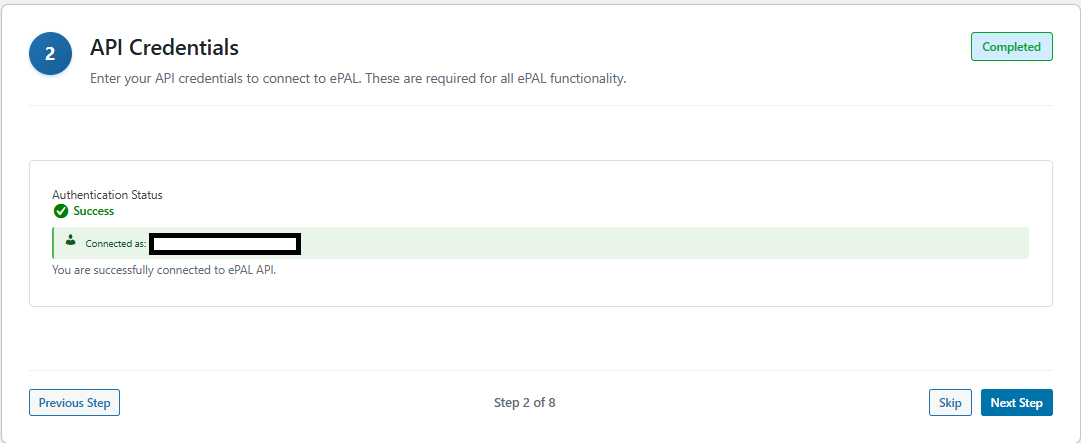
You can click the Test Connecton button to ensure the connection is working. You can also test your connection to Shippo, if you has been configured.
To logout, click Logout.
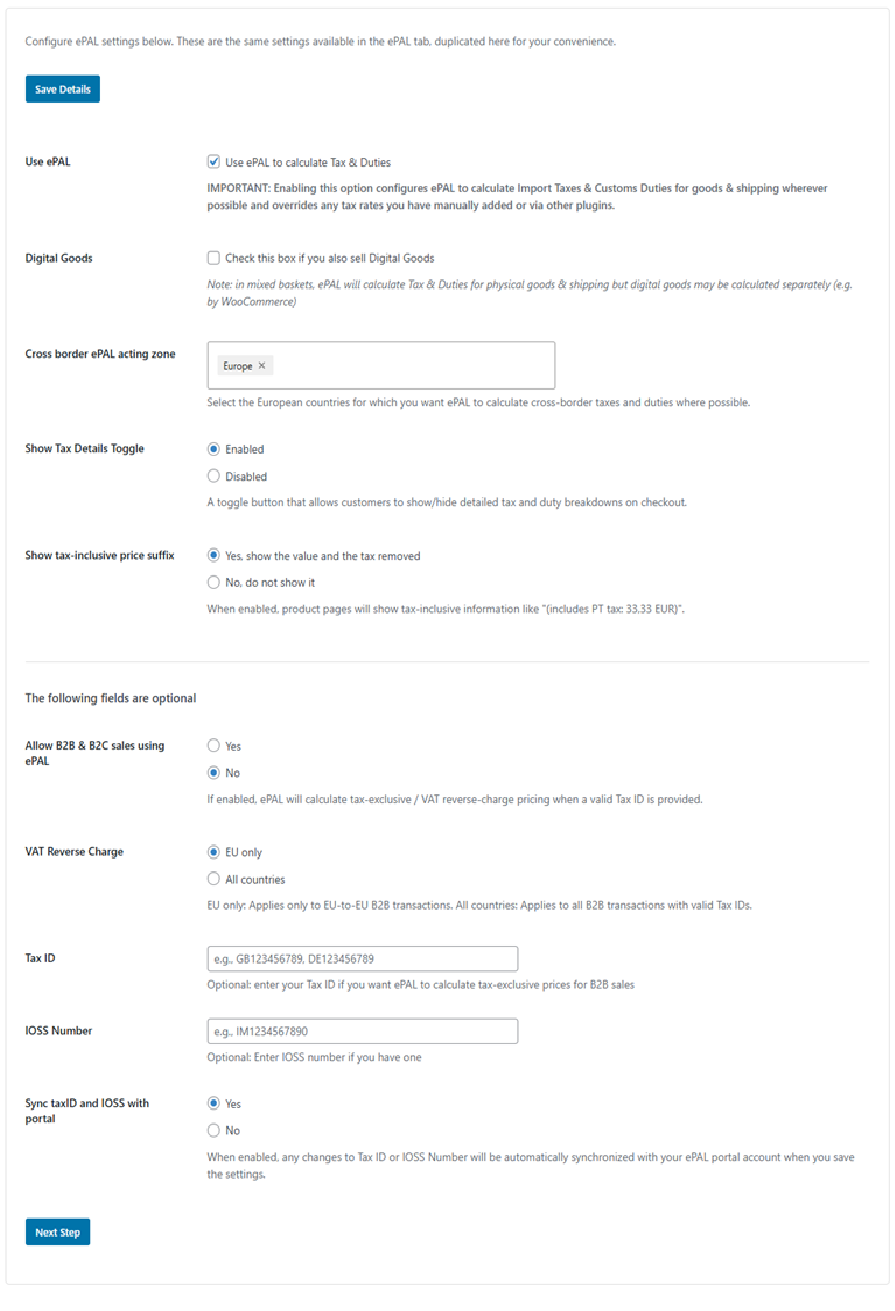
3. ePAL Tax Configuration
Next, you need to configure the ePAL tax settings that are displayed in the third step:
| Field | Description |
|---|---|
| Mandatory Fields | |
| Use ePAL |
CAUTION:
Enabling this setting
permits ePAL to change your tax and shipping totals wherever
applicable. To enable ePAL and permit it to process your transactions, you need to select this checkbox |
| Digital Goods | If you sell digital goods, select this checkbox. ePAL is not used for these goods. This setting helps it process mixed baskets. |
| Cross border ePAL acting zone | This setting governs the countries in which ePAL is enabled. To specify for all of Europe, choose Europe or you can enter individual countries and regions. |
| Show Tax Details Toggle |
Use this setting to enable or remove the Show Tax Details toggle on your checkout. Customers can use this to get more information about the taxes and duties that ePAL helps calculate. For more information, see Store and Checkout Integration (WooCommerce) |
| Show tax-inclusive price suffix |
When enabled, information about tax is displayed in the suffix of tax inclusive prices. For more information, see Store and Checkout Integration (WooCommerce) |
| Optional Fields | |
| Allow B2B & B2C sales using ePAL |
If you want to use ePAL for B2B transactions, click Yes. For more information, see B2B and Tax ID Validation (WooCommerce). |
| VAT Reverse Charge | A VAT reverse charged can be applied for B2B transactions. You can choose whether this should apply only in the EU, between EU-based businesses or the entire world. For more information, see B2B and Tax ID Validation (WooCommerce). |
| Tax ID | You can specify your Tax ID. For example, your VAT ID. This is used for validation of B2B transactions. For more information, see B2B and Tax ID Validation (WooCommerce). |
| IOSS Number | Specify your IOSS number, if applicable. For more information, see Import One Stop Shop (IOSS) (WooCommerce). |
| Sync taxid and IOSS with portal |
If you click Yes, changes made to your Tax ID or IOSS number in Woo Commerce or on the ePAL portal are synchronized so both use the updated information. If you click No, changes are not synchronized. For more information about the Portal, see ePAL Portal User Guide |
4. Shipping
You can specify your shipping address and validate it in this step:
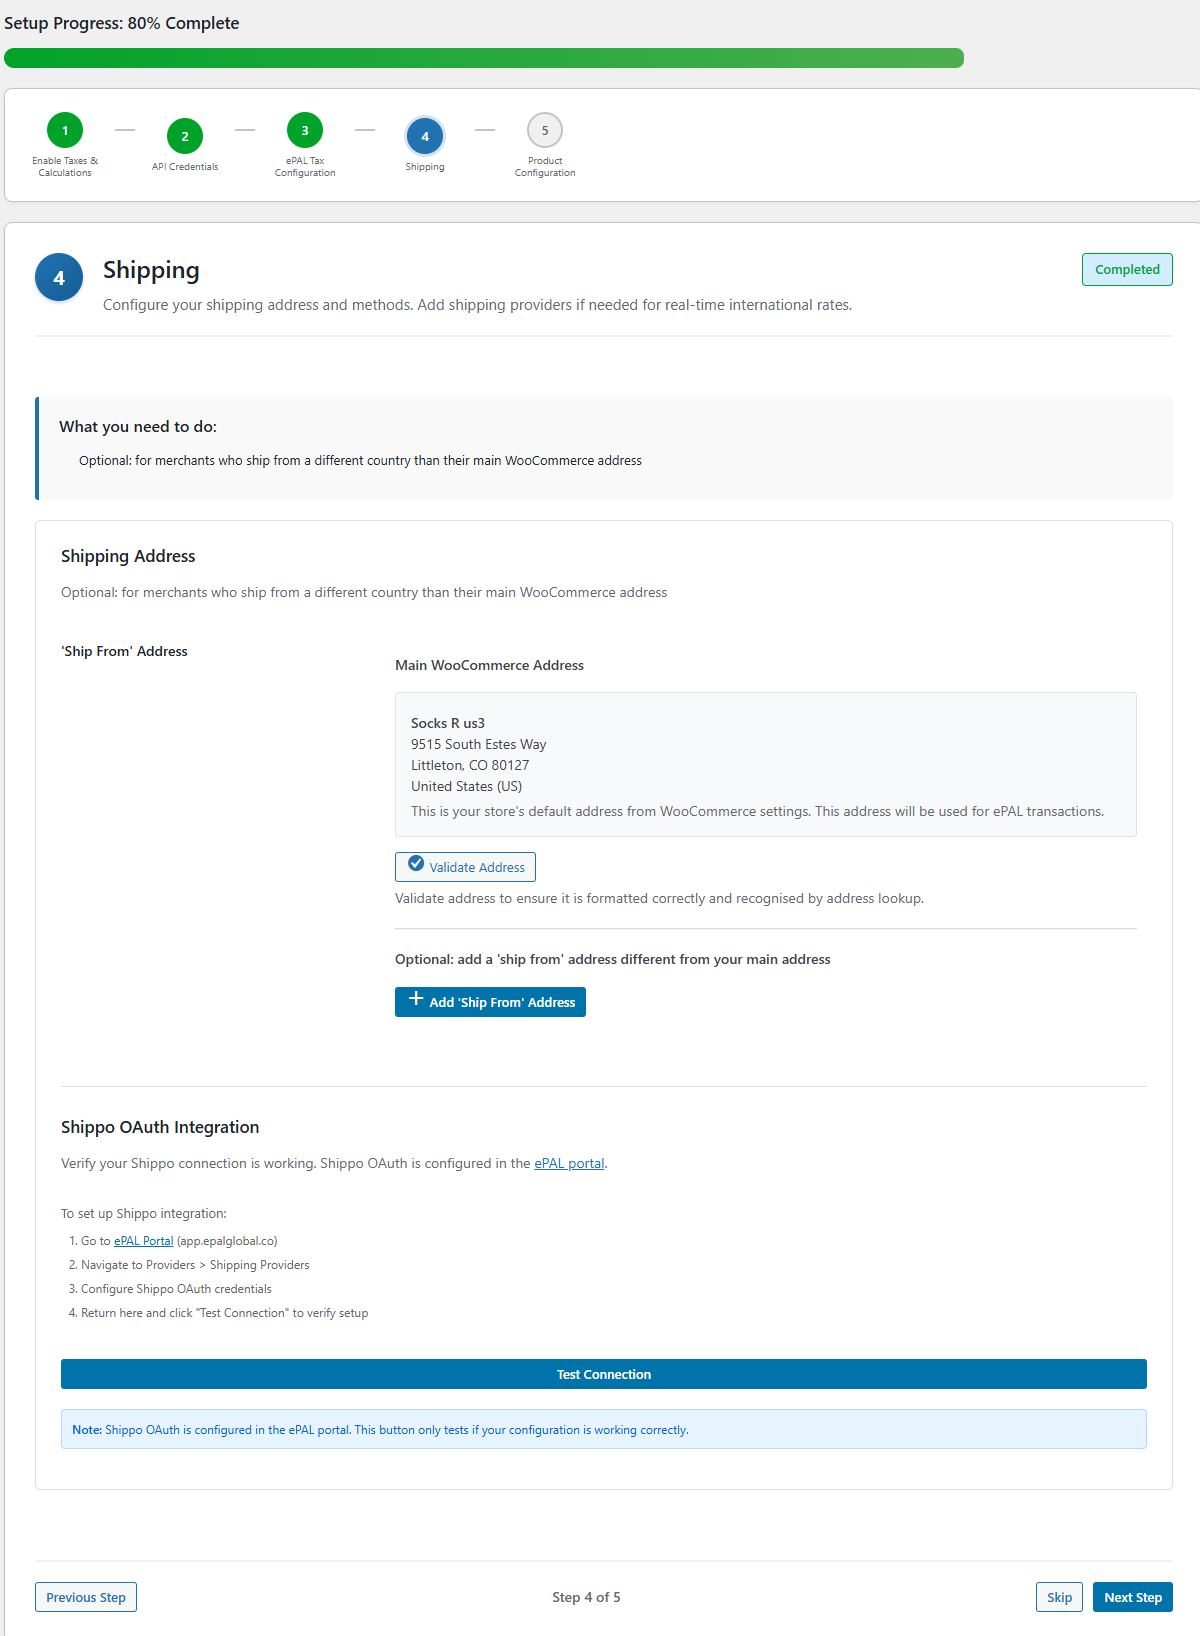
- Adding a Custom Shipping Address: Your store's address is used as the Ship From address by default. If you use a different address, you can specify it here. For more information. see the Creating a Custom Ship From Address topic.
- Enabling ePAL as a Shipping Method: You need to add ePAL as a shipping method. For more information, see the Adding ePAL as a Shipping Method (WooCommerce) topic.
- Configuring the Connection to Shippo: If you use Shippo, you can configure the connection to it. For more more information, see the Configuring the Shippo Connection (WooCommerce) topic.
5. Product Configuration
c
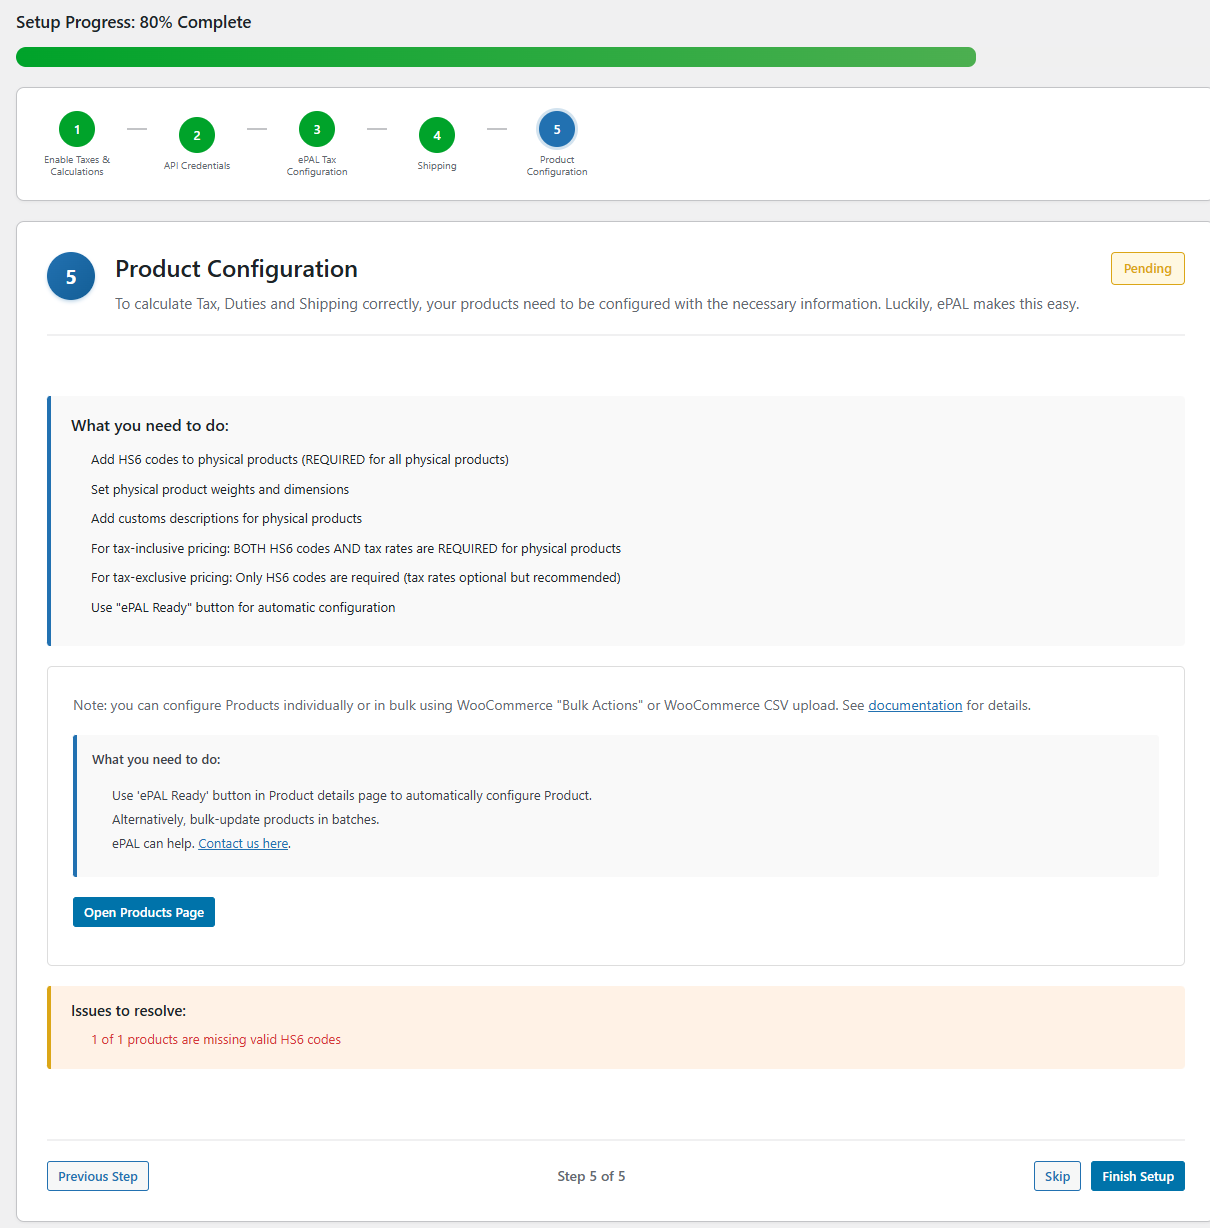
- Click Open Products Page.
- Click Edit Product.
- Navigate to the Product Data panel:

- Click Make ePAL ready. The following UI is
displayed:
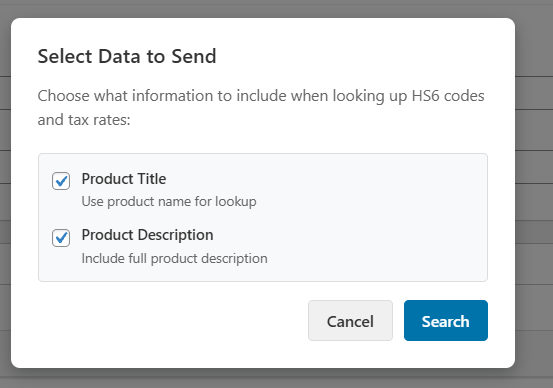
- Complete the following settings:
Table 2. Setting Description Product Title Use the product name when looking up the code. Product Description Include the full version of the product description. - Click Search. The results are displayed in the panel on the right hand side:
- To pick a result, click Select.
Click Finish Setup.
Next Steps
Next, you can test the plugin as descibed in the Testing (WooCommerce) topic.