ePAL Cross Border Calculator for WooCommerce
This section contains information about the ePAL Cross Border Calculator for WooCommerce.
If you would like a walk through of the installation, contact us at john@epalglobal.com.
An example of how ePAL processes a transaction is provided in the Example Process Flow (WooCommerce) topic.
Information about how to install the plugin and get started immediately is provided in the Start Here (WooCommerce) topic.
Restrictions
- ePAL does not support digital goods.
- The plugin is supported for sellers into the European Union (EU). This means sellers like you can be based anywhere in the world and can sell to any EU country.
- Whether a transactions is Business-to-Business (B2B) or Business-to-Customer (B2C), domestic or cross-border can all affect the applicable tax rate (in addition to other factors) and any customs duty. For more detailed information about what is supported, see Supported Taxes and Customs Duties (WooCommerce).
Business Benefits
- Easy Integration: ePAL can be integrated and running in your store in less than 1 hour, using the guided installation. See Start Here (WooCommerce).
- VAT Calculation and Reporting: ePAL identifies the correct VAT rate (including reduced- and zero-rated goods) for the source and destination countrie, calculates the correct VAT for each product, and generates compliant reports for the remittance of VAT in each country. See Taxes (WooCommerce).
- Customs and Excise: ePAL automatically identifies product classification codes for the destination country, calculates the correct Customs Duties, checks for Excise products, and provides you with verifiable and audit-ready proof. See the Customs Duty and Excise (WooCommerce) topic.
- Shipping and Labelling: ePAL provides easy access to hundreds of shipping companies to give your customer the best options and rates, and generates shipping labels and documentation that is compliant with the Customs requirements for the destination Country. See the Shipping (WooCommerce) topic.
- Product Classification: Product classification is an essential ingredient of successful compliance screening and accurate Fully Landed Costs (FLCs). ePAL includes a number of features to help you with this. See the Product Classification (WooCommerce) topic.
- Reporting and Analytics: Audit logs and reporting on yout ePAL transactions.
- Customs Pre-Clearance: ePAL allows you to ship goods to your overseas buyers knowing that everything that is needed to clear customs has been provided by ePAL and integrated with your shipping provder's labels. In many cases, ePAL helps ensure that can take advantage of pre-clearance in customs to help goods reach your buyers more quickly.
- Coverage for IOSS, non-IOSS, B2C and B2B: There are a number of distinct tax schemes and variations such as B2B that need to be accounted for. ePAL helps you with these. For example, Import One-Stop Shop (IOSS) is a scheme to help importers sell goods into the Eu. ePAL allows you to specify your IOSS if you have one. See the Import One Stop Shop (IOSS) (WooCommerce) topic.
- Refunds and Returns: Easy international refunds and returns process, pre-printed labels and documentation, automatic calculation of VAT and Duties reclaims.
Component Overview
The following graphic shows the main components in a typical deployment of this plugin as well as some features:
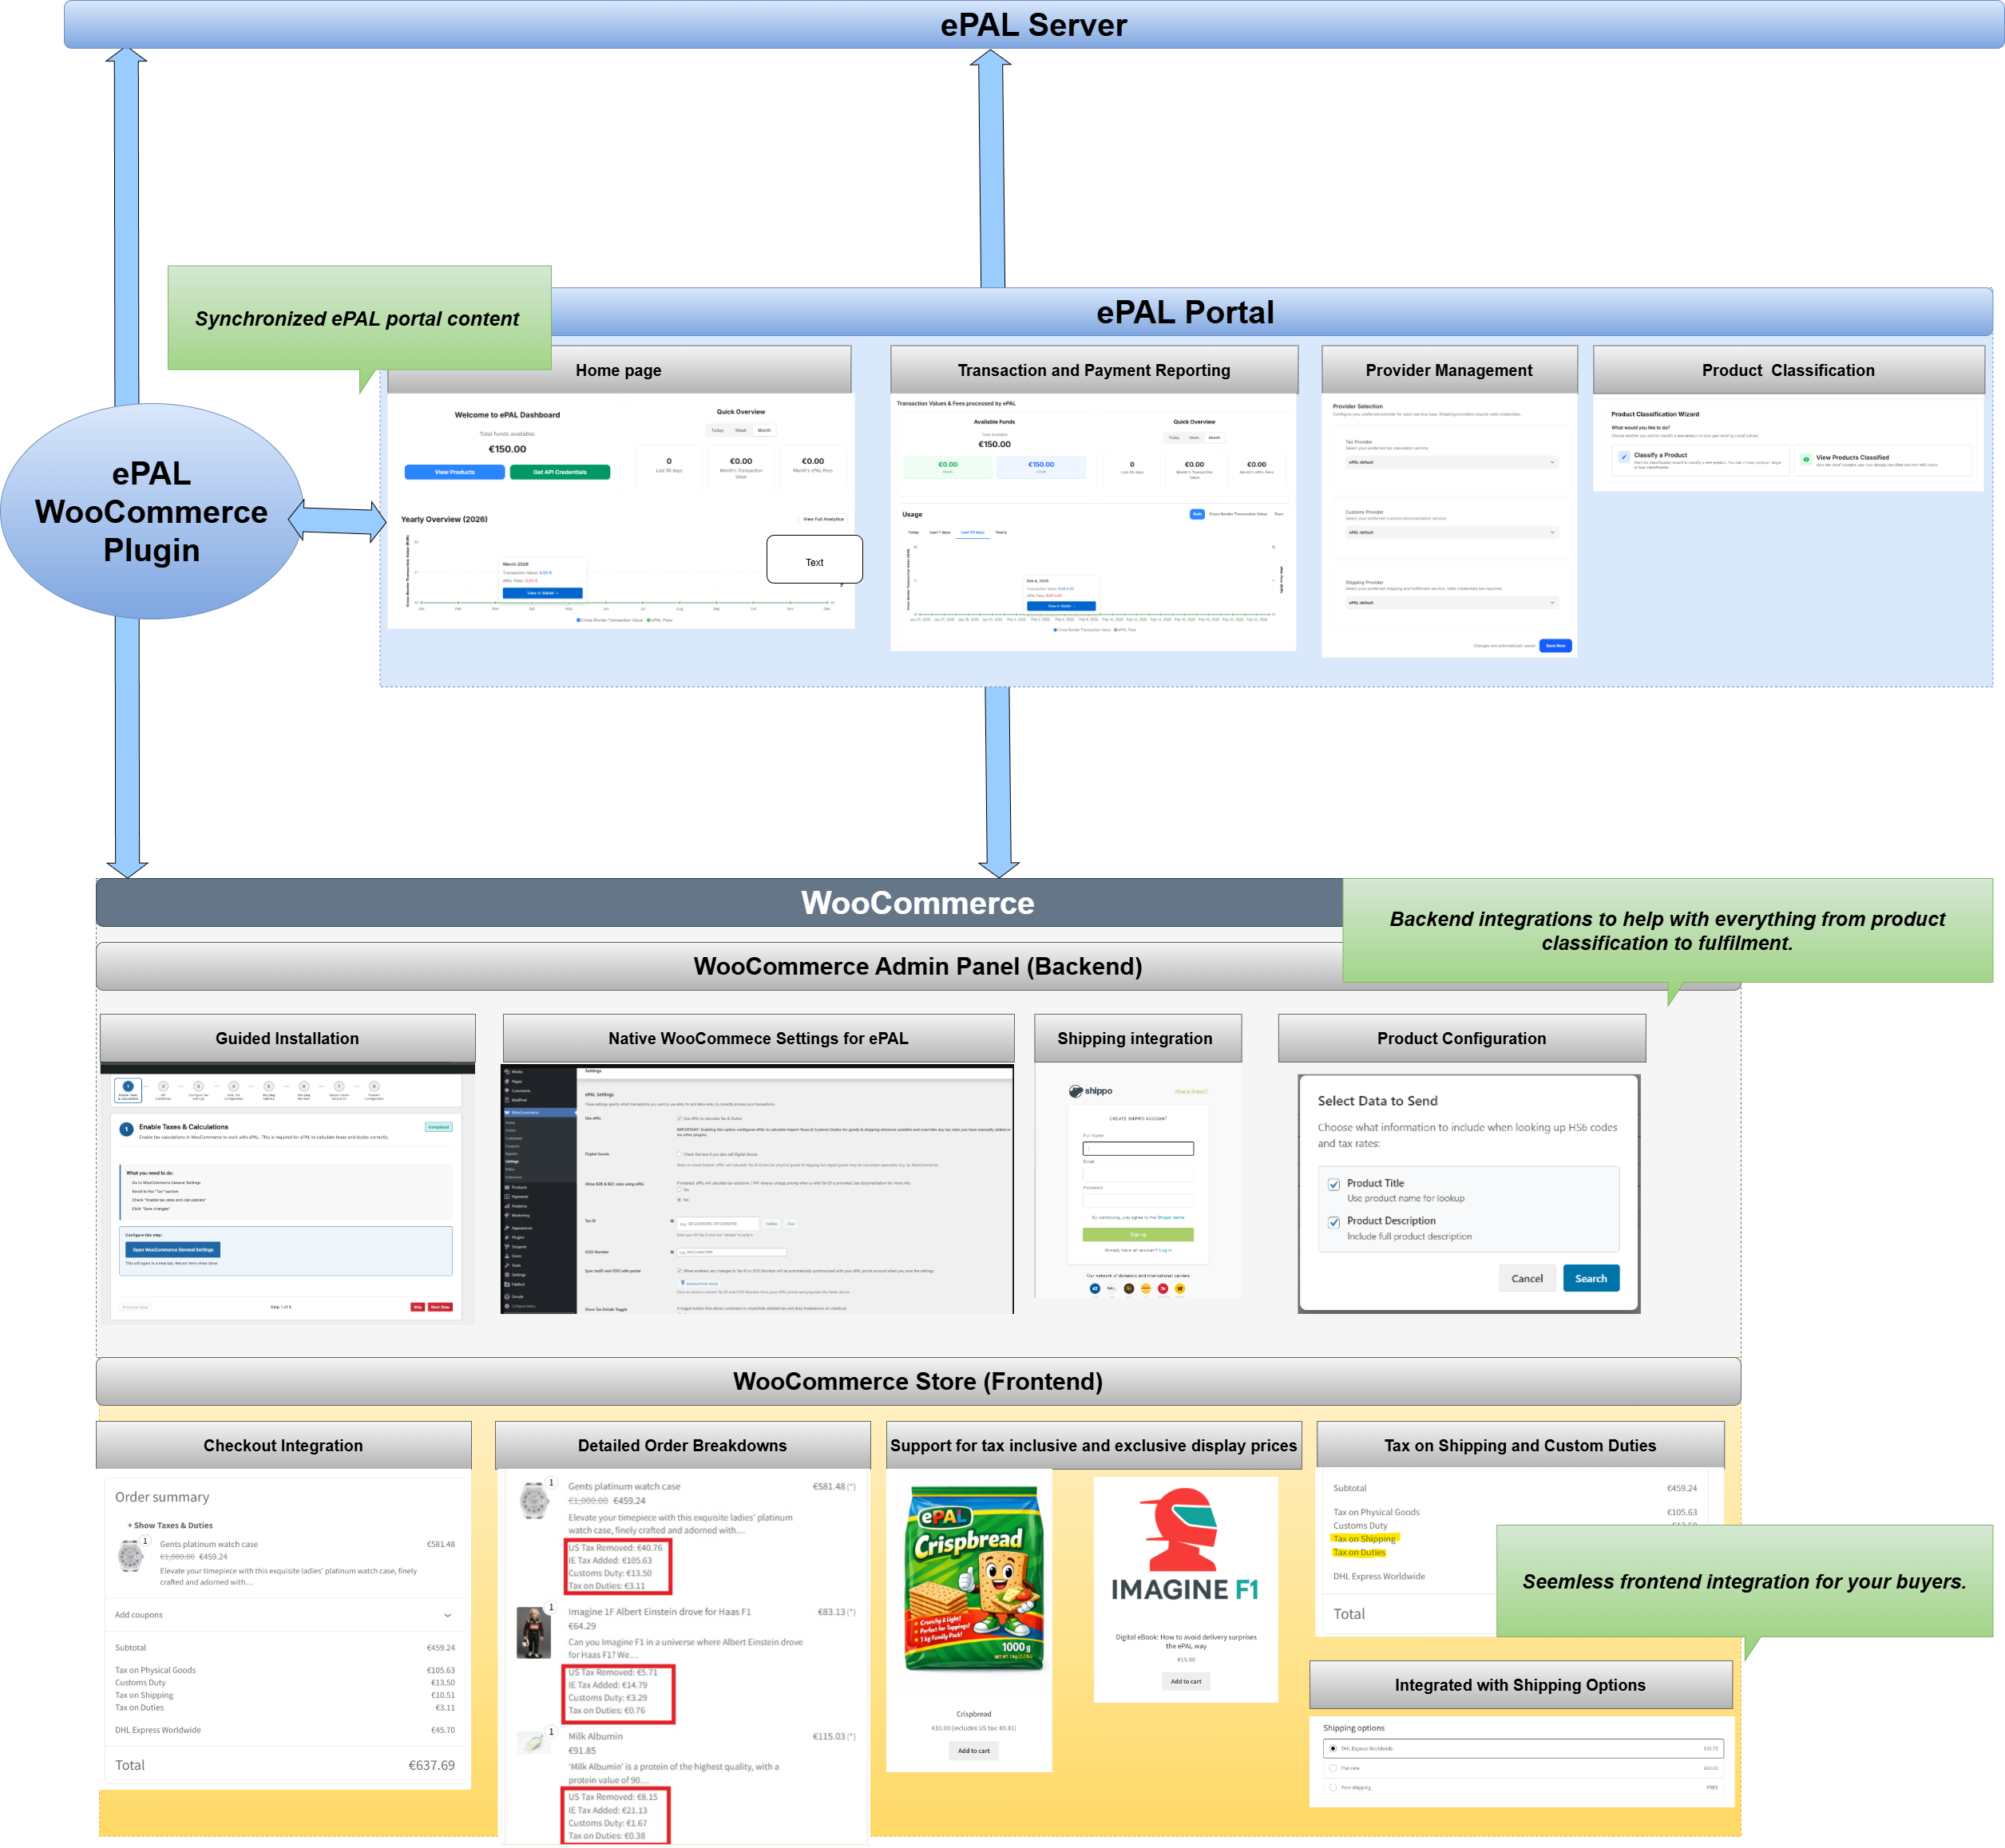
- ePAL Server: This is the backend engine that handles calculations and other processes.
- ePAL Portal: ePAL also provides a portal where you can register your profile, view reports and change some settings. The content here and within the plugin can be synchronized so that it remains aligned.
- ePAL Plugin: The plugin integrates the ePAL's functions with WooCommerce.
- WooCommerce: The WooCommerce
integration can be split into the back- and frontend integrations:
- Admin Panel (Backend): The plugin is integrated into your WooCommerce Admin panel so you can manage all your ePAL relevant settings from there. It also integrates with native WooCommerce functionality for things like product classification and order fulfilment.
- Store (Frontend): ePAL's features like tax and customs calculations are also available to the buyers in your store.
Installation
ePAL provides a Guided Installation wizard to help you get up and running as quickly as possible (usually less than 30 minutes). See Start Here (WooCommerce)
Features
A list of the available features is provided in the the Features (WooCommerce) topic.
The User Guide is provided to guide you through the features you can use in WooCommerce. See User Guide (WooCommerce)