Creating a Custom Ship From Address (WooCommerce)
If your Ship From address differs from the store's default address, you can create a ne w
Generally, you complete this during step 4 of the guided installation.
You can also use the Settings tab of the ePAL settings.
Steps
- Open Woo Commerce, click .
- Under ePAL Integration Plugin, click Settings.
- Click Add `Ship From`Address.
- Complete the fields in the following UI:
Figure 1. New Address UI 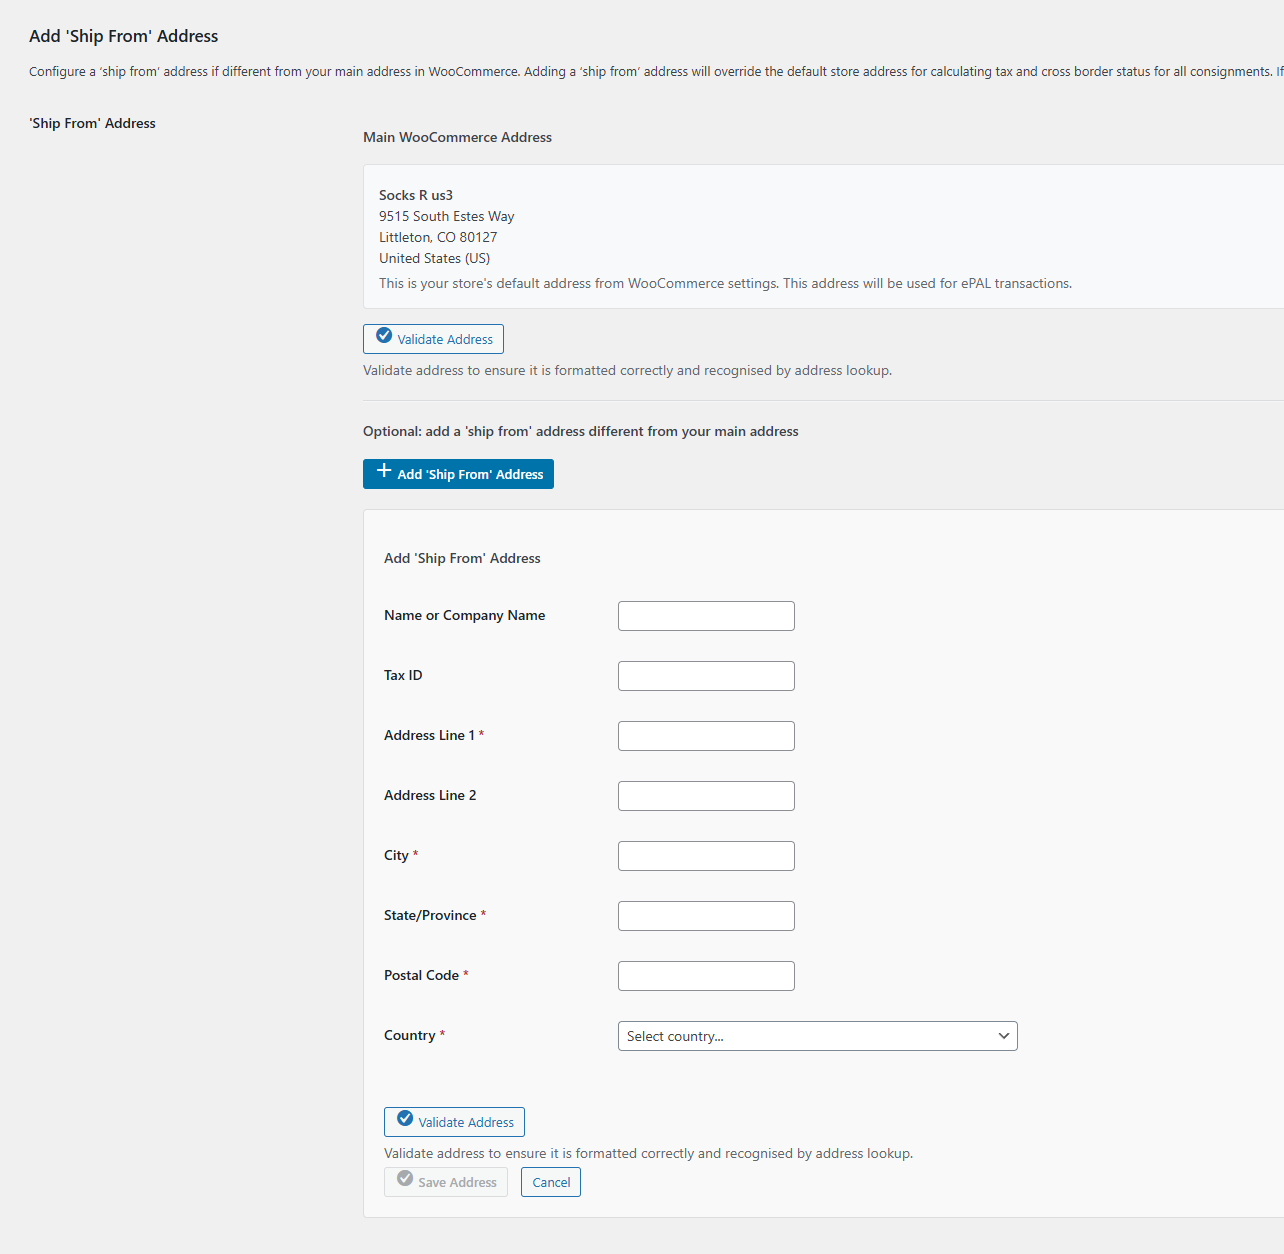 Complete the required fields:
Table 1. Address Fields Field Requirement Description Name or Company Name Optional Specify the name or company name. Tax ID Optional for users who do not process B2B transactions. Specify the ID that identifies your participation in a tax scheme. For example, it might be your VAT ID. For more information, see B2B and Tax ID Validation (WooCommerce). Address Line 1 Mandatory Specify the first line of your address. Address Line 2 Optional If needed, specify the second line of the address. City Mandatory Specify the city. State/Province Mandatory Specify the country subdivision such as a State or Province. Postal Code Mandatory Country Mandatory Tip:You can use the Validate Address button to verify that the details are correct.Note:We recommend that you add Postal Codes for all countries. It is required for Spain, the United Kingdom of Great Britain and Northern Ireland (UK), and Spain. You must provide it for these countries.
States or provinces are subdivisions within a country. The following countries require that you specify the state or subdivision in address information:- Australia
- Brazil
- Canada
- India
- UK
- United States of America
- Save your changes.